

Hi there...
Some of you may have come to know, that I like to get the most from my digi images! Much as I love my rubber stamps, you're limited with their size. I think many crafters feel that digi's don't give you the flexibility of rubber...but I am going to try and show you that they do! A digi image will give you a large image to print onto a T shirt or bag... and yet it will go small enough for you to be able to add a whole or part image, to the inside of your card for instance.
One thing I really wanted to be able to do was add a digi image to a candle, as I think the effect of matching candles and cards as gifts are just something else! So...last year I set about it. After many sheets of tissue paper, several attempts of rebuilding my printer after getting the torn, screwed up and jammed tissue paper out...I did it!
I mentioned to Elisabeth that I was making a candle/card set for the October digi launch, and asked if she'd like me to do a tutorial for the candle...'Yes please' came the reply! :) And since the launch I've had several people ask how I get digital images onto a candle, so here we go with an updated version using Elisabeth's gorgeous new October digi release ... Eden's 2nd Christmas ...
You will need...
A plain candle
White tissue paper
Wax or Greaseproof paper
A piece of average A4 cardstock
Low tack tape
A digi image
A printer
A heat gun
Oh...and colours and decorations! First, lay tissue paper over a piece of A4 cardstock, and wrap it over the edges, sticking it down with low tack tape to stop it getting caught in the printer! You can guess how I know that!! :)
 First, lay tissue paper over a piece of A4 cardstock, and wrap it over the edges, sticking it down with low tack tape to stop it getting caught in the printer! You can guess how I know that!! :)
Print your image onto the tissue paper in the same way you would onto cardstock.
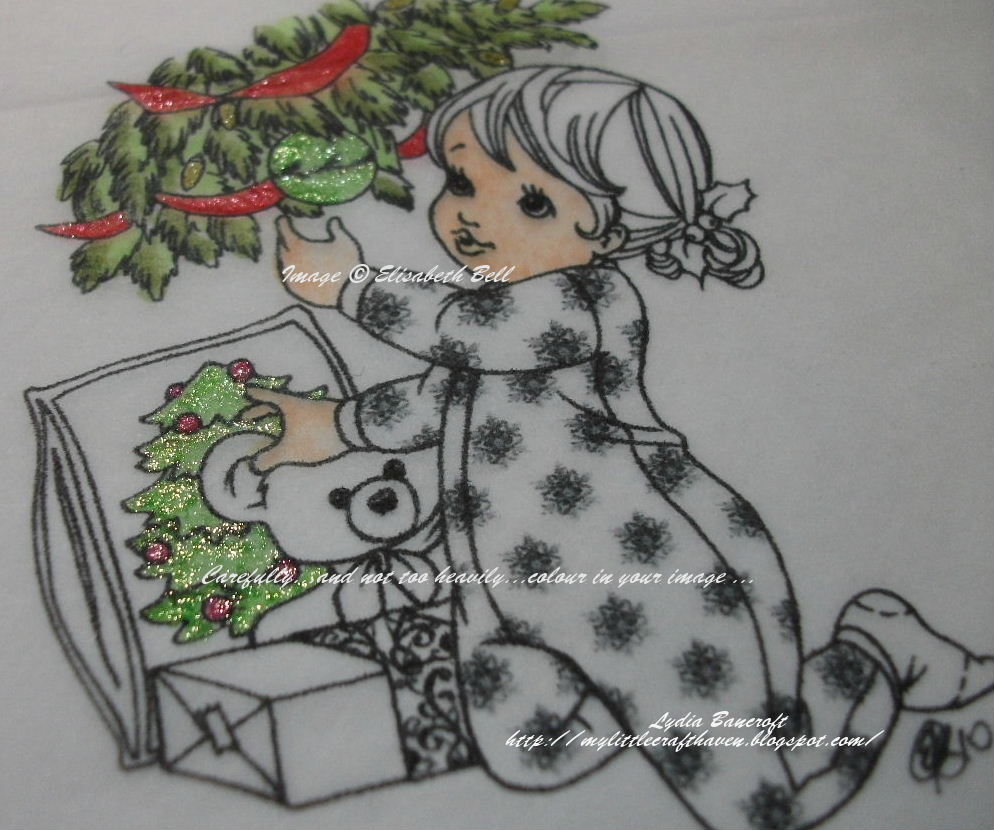 Gently colour your image, being careful not to get it too wet so as it tears...
I used Copic Spica and ProMarker pens on mine...
 When you've finished colouring...cut it out...making sure you leave just a small margin of tissue paper around the image...
 Lay the image over the candle at the place you'd like it...
 Then lay a piece of wax (or grease proof) paper over the top...
 Ensuring that the paper is long enough to wrap completely around the candle AND for you to hold onto to keep it tight.
 Then wave your heat gun slowly over the image. Keep the gun moving at all times or you will cause 'dents' and 'runs' in the wax.
 The image will take on a shiny look as you go...this is fine...just keep moving!!
 Carefully peel back the wax paper and check to see that all the tissue paper has adhered to the wax. If it has patches, as it has in my picture by the arrow, that haven't 'disappeared'...then put the wax paper back...pull it tight and heat gently again.
 Remove the wax paper completely when you're happy with it...embellish...and you're done!!!!
 **You can add most things to decorate them, as candles usually burn down the centre and not down the edge...BUT...you must use with caution and not leave them burning without supervision.
I am in the process of making a gift box to put the candle in...so watch this space!!
2 comments:
Brilliant explanation of the technique. Now I can have a go at something I've had planned for a while.
Just out of curiosity, is there going to be a tutorial on striping and assembling printers? ;)
x
Fabulously clear tutorial - and something I keep meaning to try!!!!
Thanx for the inspiration!
xXx
Post a Comment