Showing posts with label 3D Flowers. Show all posts

Monday, 28 March 2016

Powertex Poppies...


Hello...and Happy Easter to you all...
and WoW...what an Easter weekend it has been, here in the UK!
Good Friday was an absolutely gorgeous day...totally Springlike, with beautiful sunshine and singing birds...Saturday and Sunday daytime wasn't so great
...THEN...
Storm Katie invited herself over!!!
Sunday night into Monday was horrendous!! She left a trail of destruction around the South, but on the scheme of things, with just minor damage to the front gate, we got away with it!
I hope you're all safe xx
-------
Anyways...today I thought I'd share with you a canvas I made using Powertex products.


I've brushed Ivory Powertex over the surface of the canvas.
Added  Easy Structure through a script stencil to give it some background texture.
Adhered the cotton cleaning mop threads and fabric strands using Powertex.
Brushed on some extra Ivory Powertex in places and sprayed Green Bister, which reacts with the Powertex to form wonderful crackles. 


Made some fabric poppies...dried them and coloured using Powertex Powercolour Pigments, mixed with Easy Varnish...
Added medium 3D balls to the centres, using Powertex to 'glue' them...
when dry - dry brushed Black Powercolour pigment and then a dab of Gold to finish. 


I'm just loving the Powertex products...there is soooo much you can do with them...
the only problem is finding enough hours to play! :) 

I have entered this into:

That's Crafty - Red and Green Challenge
Love to Create - Mixed Media Anything Goes


Have a great week

Happy Crafting
Lydia x


Friday, 25 March 2016

Powertex for Paperartsy...


Hi all...and Happy Easter!!
I'm absolutely loving Powertex, so when  found a challenge with 'fabric sculpting medium' as a theme, I was off and running for my apron and gloves!! :)
As it's Easter and the sun is shining (for a while!) I thought I'd go for the delicate, spring look.


I used Transparent Powertex and added some Light Blue Powercolour (pigment) to change it to a lovely pale blue. 


The mannequin was coated in Ivory Powertex, as was the wooden ornamental stand.
When dry I gave the mannequin a coat of the pale blue from the bust down.


A piece of lace was dipped into the Powertex/pigment mix, and draped over her shoulders and bust.


I then added more Transparent Powertex to drop the colour tone slightly, and then coated the netting.
Added another layer of lace trim, and coated ribbon for a decorative centre drape.
When dry, I added a wooden butterfly, which had been coated in Powertex and dry brushed with Gold Colourtrix.


The hat was made from a polystyrene ball, a few layers of die cut card circles...some Paperdecoration..and the same lace ruffle that went around the mannaquin's waist.


I've then finished off the stand and her hat by dry brushing Light Blue Powercolour and Gold Pearlecsent Pigment...and added some lovely paper roses and little doves.
Lastly, I added a hand made bead pin to the top of the mannequin, and having made a hole in the underside of the hat - rested the hat on the top.


Thanks for taking a peek...and hope you like her x


I'm entering this into the Paperartsy challenge:
My inspiration came from Nicole, who had created a beautiful statue with a head wrap.


Thursday, 3 September 2015

Frame It - IndigoBlu Demonstrator Inspiration...


Hi all
Well, Summer seems to have turned it's back on us, and September snuck in whilst no one was watching!! The nights are drawing in and Autumn is just around the corner....but I do love this time of year...it's so colourful and has that healthy kind of start to your day!
It also means more 'stay in and craft' time :)

This month, the IndigoBlu Challenge Blog theme is 'Frame It' .....
Frame an image...frame a sentiment...decorate a frame...or frame a frame...how ever you want to frame it, is ok with us! :)

I have used the totally gorgeous Giant Poppy as my focal image, using our IndigoBlu English Cottage Artist Quality Paints to hand paint both the Poppy and the background.
Rob has been back in his shed, and made me a frame from MDF (bless his cottons :) ) ...that has a covering of Texture Paste...dried... a coat of Black GeeSso Good - Gesso...and Vodka Martini! ;)

If you get a chance, nip across to the blog and see what the Challenge team have created...there is so much fabulous work over there as always x

--------------------
We would love for you to join in...and don't forget.....

The fabulous winner’s prize this month is your choice of IndigoBlu stamps.  As always, you have 3 options to choose from:

1:   2 Large stamp plates
or
2:   4 Small stamp plates
or
3:   1 Large and 2 small plates

There’s also the Winner’s Badge, and one for the Top 3, to display proudly on your blog, and the WINNER of the challenge will also be invited to do a GUEST SPOT on a future Challenge Launch post. That’s right, your work will be on the Challenge Blog alongside the Design Team!

Also the Top Three each month (chosen by our lovely DT) will all be invited to do an inspiration piece to be included on the new reminder post that now goes live mid challenge. So, if you’d like a chance to be featured on the IndigoBlu Challenge Blog get those stamps out and get creating!


To all those with children returning to school this week... I wish them all a great new term x

Happy Crafting...

Lydia xx


Saturday, 4 April 2015

Cascading Lace...


Hi All 
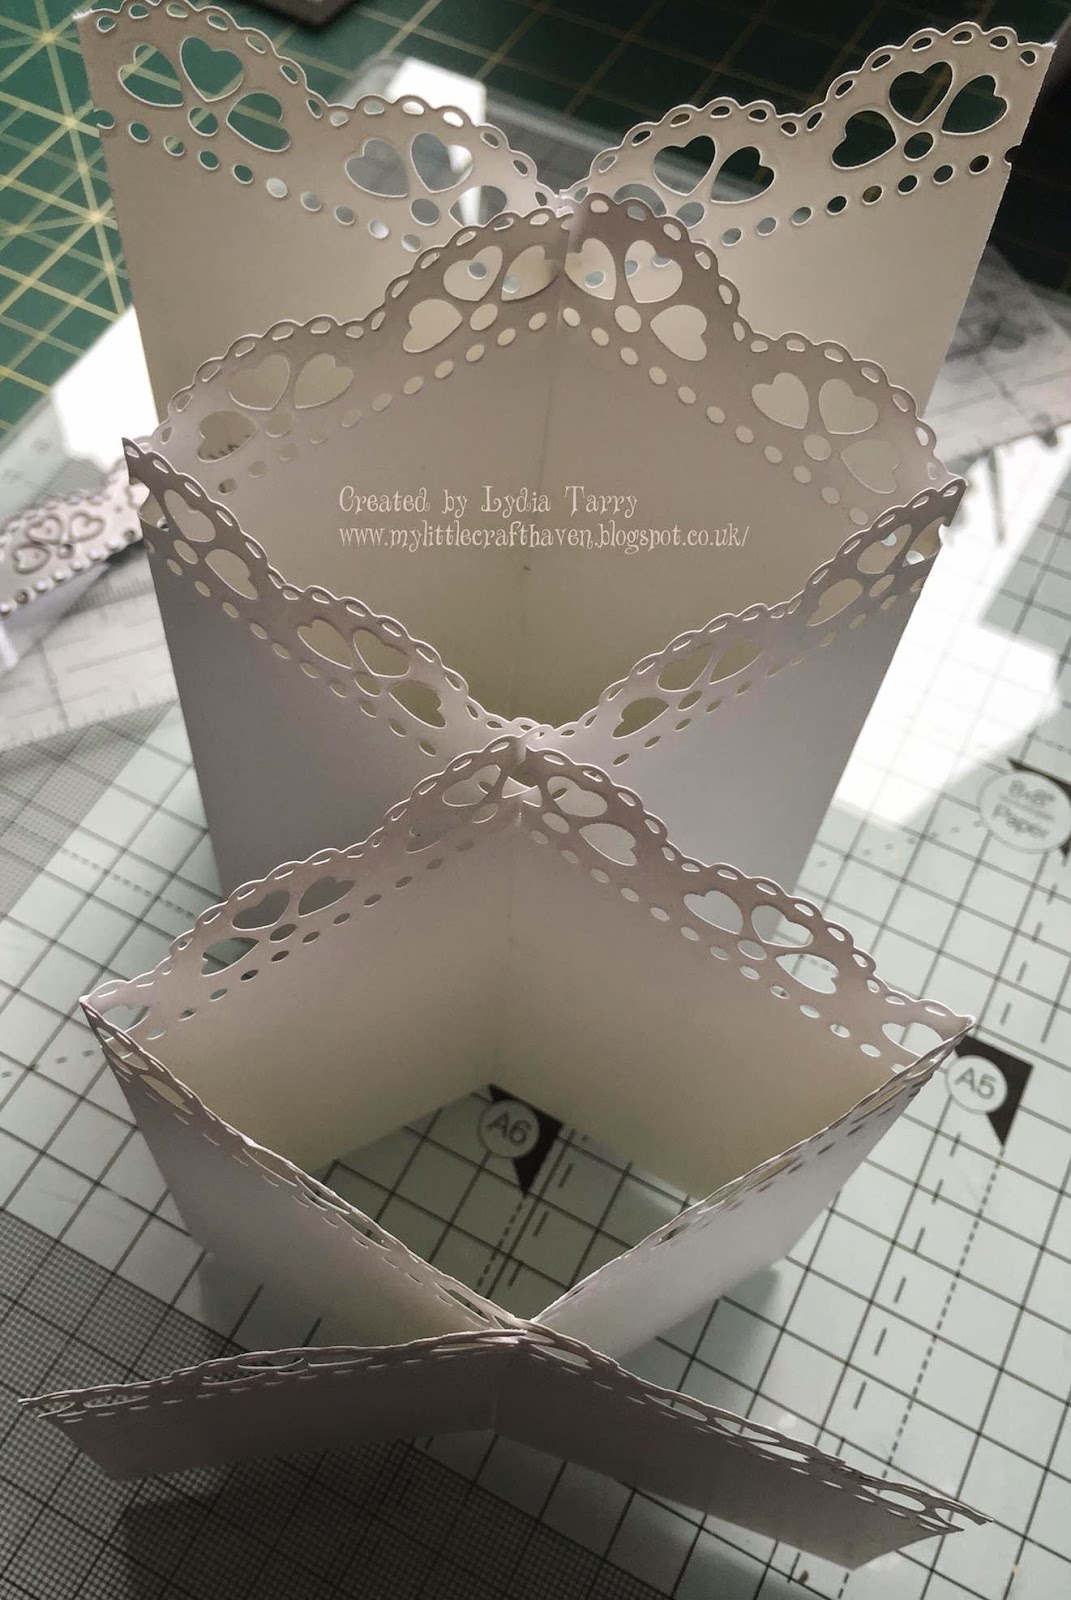
 I decided to bring you a card this time over on the Tattered Lace Blog ...a cascade card...but I wanted a background too, so here's how I made it....
(This post is a bit photo heavy, but I think it's easier to follow with pictures :) ) 

To make the cascade card you will need two pieces of 5 1/2 x 12" white card stock. 
On each piece, measure and mark the short side at 2 1/2" from the bottom.

Cut across from 5 1/2"  to 2 1/2" on both pieces so you get a wedge shape.

On each piece score at 2" 4" 8" and 10" .

Next you need to measure and mark the longer side at 2 3/4" ...and the shorter side at 1 1/4".

With a long ruler, line up the two edging marks and then at the point the ruler crosses the score lines - make a mark.  You also need to make a mark at the 6" point...but do not score or fold at 6".

The slope of the wedge is the top of your card. 
Take one piece. From the bottom, cut UP to the little marks that you made at 2", 6" and 10" intervals.

On the other piece, cut DOWN to the marks at 2, 6 & 10".

Fold on all the score lines...but remember...DON'T fold at 6".


I have used the Scalloped Heart Border die to edge the top of the cascading part.


Now we can put it together.
Starting with the two longer ended pieces, interlock the cuts, so they slot together at 2, 6 & 10".


Fold it - so it 'cascades' as in the picture.


You are then ready to decorate!


I used some of the gorgeous papers from Stephanie's 'Sugar Rush' Collection to make panels for the cascade card and to cover the 7 x 7" base card. 
The papers were embossed before cutting, using the Tattered Lace - Script - Embossing folder.
All the panels were edged with Worn Lipstick Distress Ink, before adhering to the card. 
I also put a 'smidging' on the decorative border edge. 

The beautiful Majestic Daisy, was cut twice in green mirror card, and twice in pink. 
The Just for You washing line die was cut once in green mirror card and once in plain white card stock.
The small butterfly from the Build a Butterfly set was cut twice in pink mirror card and once in green. The large butterfly was cut once each in pink and green...and the body - once in green. 

Putting together!
The Daisy's were cut from the pink die cut and adhered over the green.
The large pink butterfly was adhered to the body, then the large green and small pink layered on top.
The small green layered onto the small pink butterfly...and the Just for You green wording shadowed over the white. 
These were all then adhered into place, with the Just for You being strung across the front, through a couple of holes from the border design at each side. 

The cascade card was adhered to the base card, and to finish it off, I added some pearls and a little bow .


Tattered Lace Products used...


Have fun!
Happy Crafting
Lydia xx

Tuesday, 10 February 2015

I 'Love' This Die!!!


Hi Everyone  :)
 I'm back with another project that's on the Tattered Lace Blog, using the fabulous Monumental Moments - Love die. 
Whilst this die enables you to make some stunning cards - equally it lends itself to the class of home decor.
Today I am sharing with you a stand up piece that is sturdy & simple to make x
-------
You will need to cut 8 'Love' words in a sturdy card-stock...I've used 300gsm. Glue and layer each die cut...remembering to trim the tab top of the 'O' into an oval on each layer as you go.

Coat the entire piece with Gesso, including all the edges, and leave to dry.

Whilst that is drying cover a plain mdf plaque with some designer paper, then run Walnut Stain Distress Ink around the edges.

Take the Love wording and spritz it with some watered down acrylic paint.

I have then used a crackle stamp & some gilding flake to decorate both the wording and the base, and run Distress ink in both Walnut Stain and Worn Lipstick around the edge.

Stamp a verse/sentiment of your choice onto the base and then, with a hot glue gun, adhere the wording to the mdf base, holding it steady while the glue sets.

Cut 2 butterflies in matching papers, ink and gild random areas and adhere to the 'O' ...cut a few sets of the Floral Flourish & Lacy Rose dies...ink and adhere those also.
That's it...you're done!! :)


Thursday, 22 January 2015

Tattered Lace - With LOVE...


Hi Everyone :) 

This is the first project that I've made for the fabulous Tattered Lace inspiration blog...and I am honoured to be part of it.  
As we are heading towards Valentine's Day, I thought I'd share this lovely heart wreath with you today.


The heart wreath is approx 20cm x 20cm. I picked this one up from a garden centre, and as it was a natural woody colour, I painted a layer of white Gesso over it. 
I cut the LOVE die in both white card and pale lavender mirri card...and a few of the Floral Flourish & Lacy Rose in green and pale pink mirri card. 
To the white LOVE die cut I randomly brushed on Seedless Preserve Distress ink, then added a few hand-painted flowers. Whilst these dried, I added some of the same distress ink to the white heart wreath. 
I then adhered the white LOVE word over the mirri one in a shadow effect, and hot glued it to the wreath, adding the Floral Flourish & Lacy Rose's.  To finish it off, I cut and added the word 'with' ...also from the LOVE set. 
These would be gorgeous in wedding theme colours to present to the bride on her wedding day too! 


Tattered Lace Tools


Happy Crafting
Lydia x


Friday, 9 January 2015

Purple Weddings!!


My poor old blog has been a bit neglected of late as we move into the realms of  the social sites of Facebook/Twitter etc...but as it was a NYR of mine to put more on here...I'd better do just that! :)
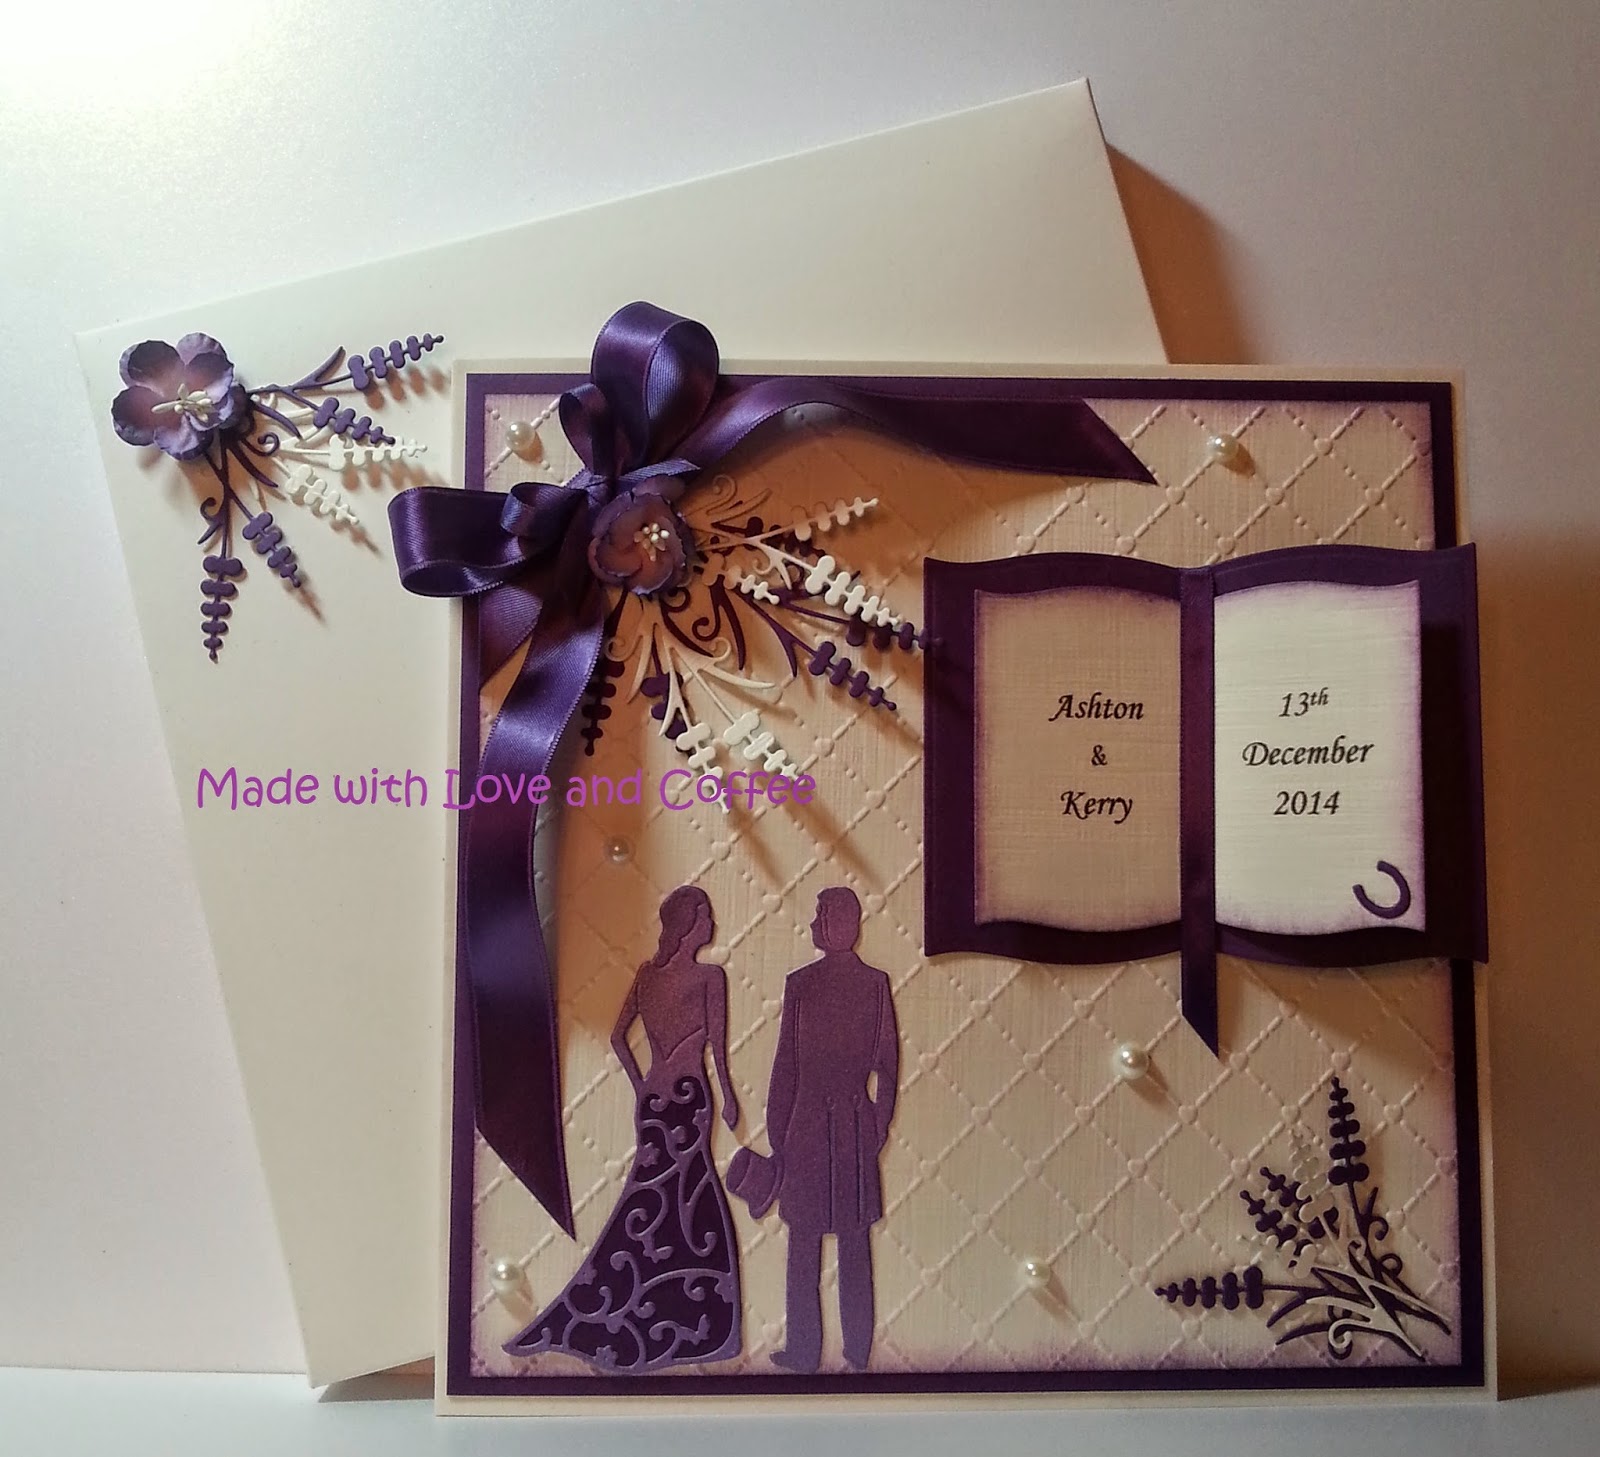
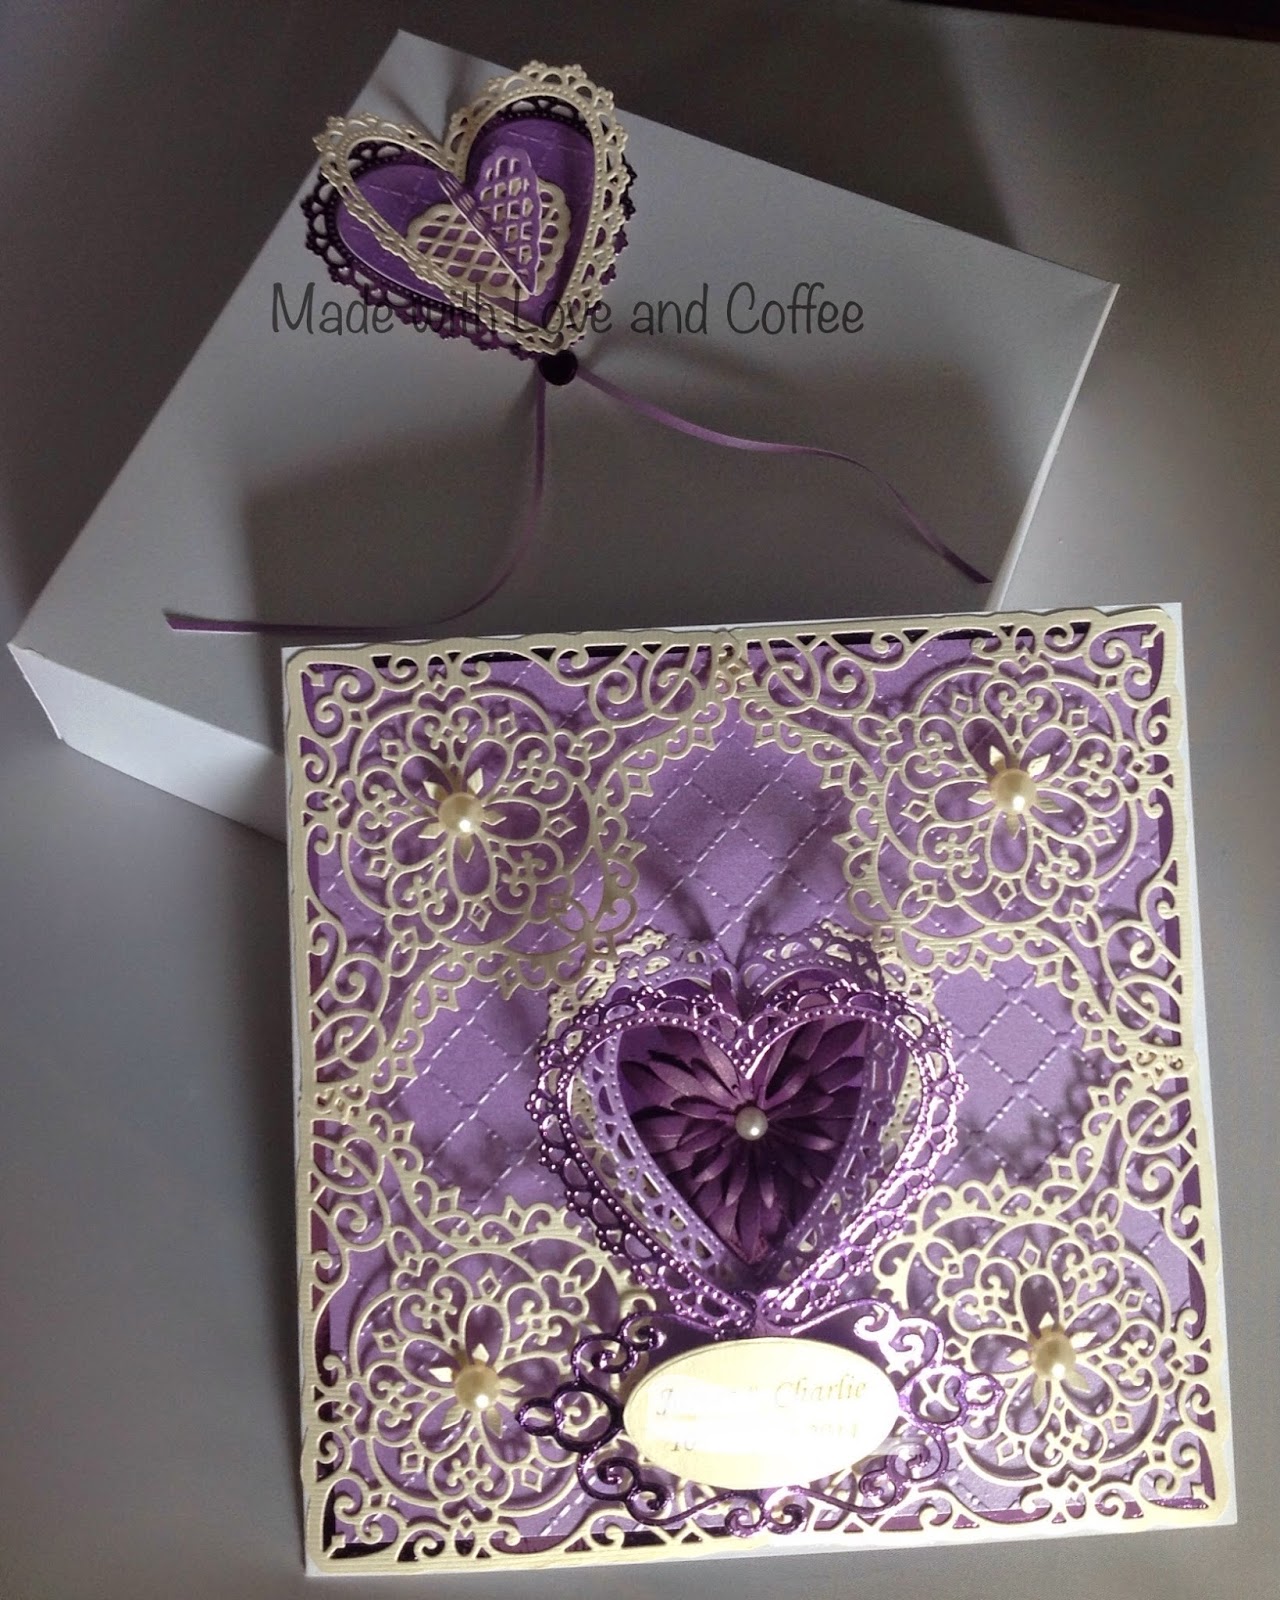
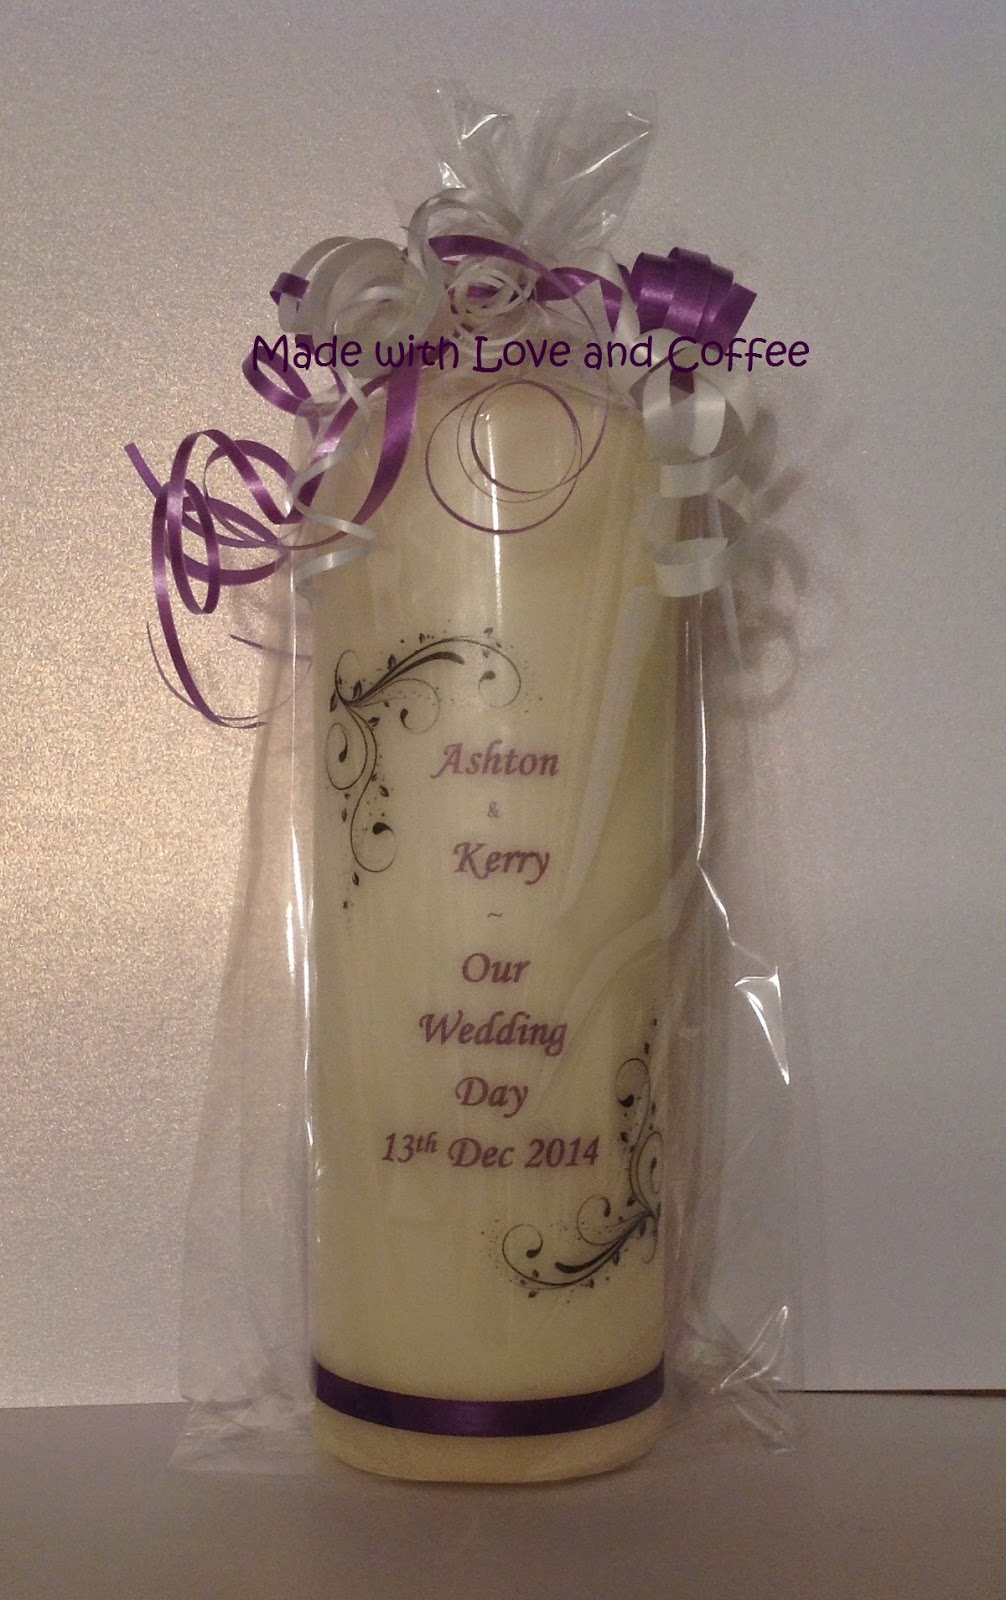
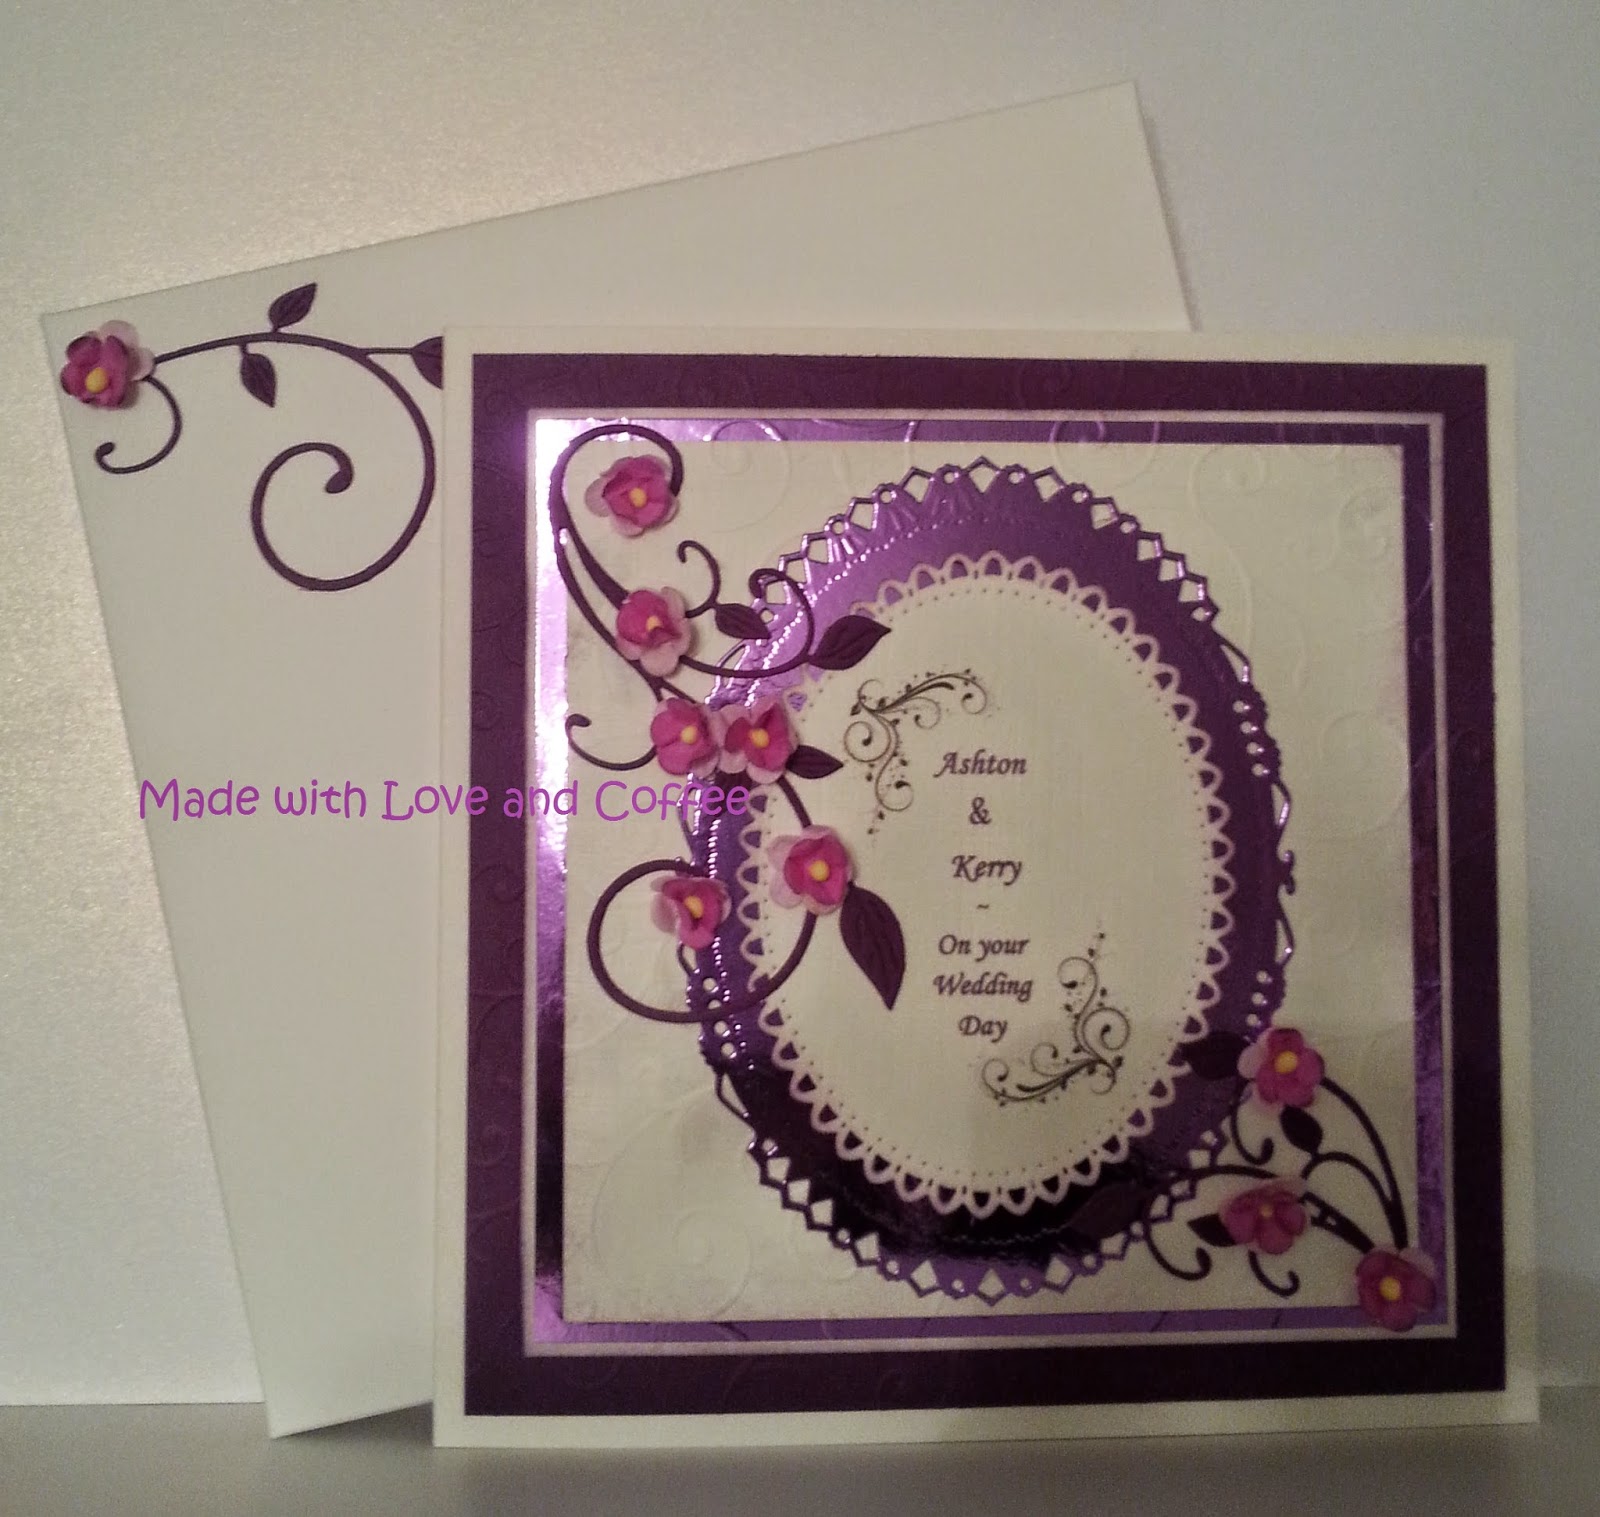
 Before Christmas I had a few wedding orders to do...which actually was quite a nice break from all things Christmas...and Cadbury Purple was obviously an in colour!


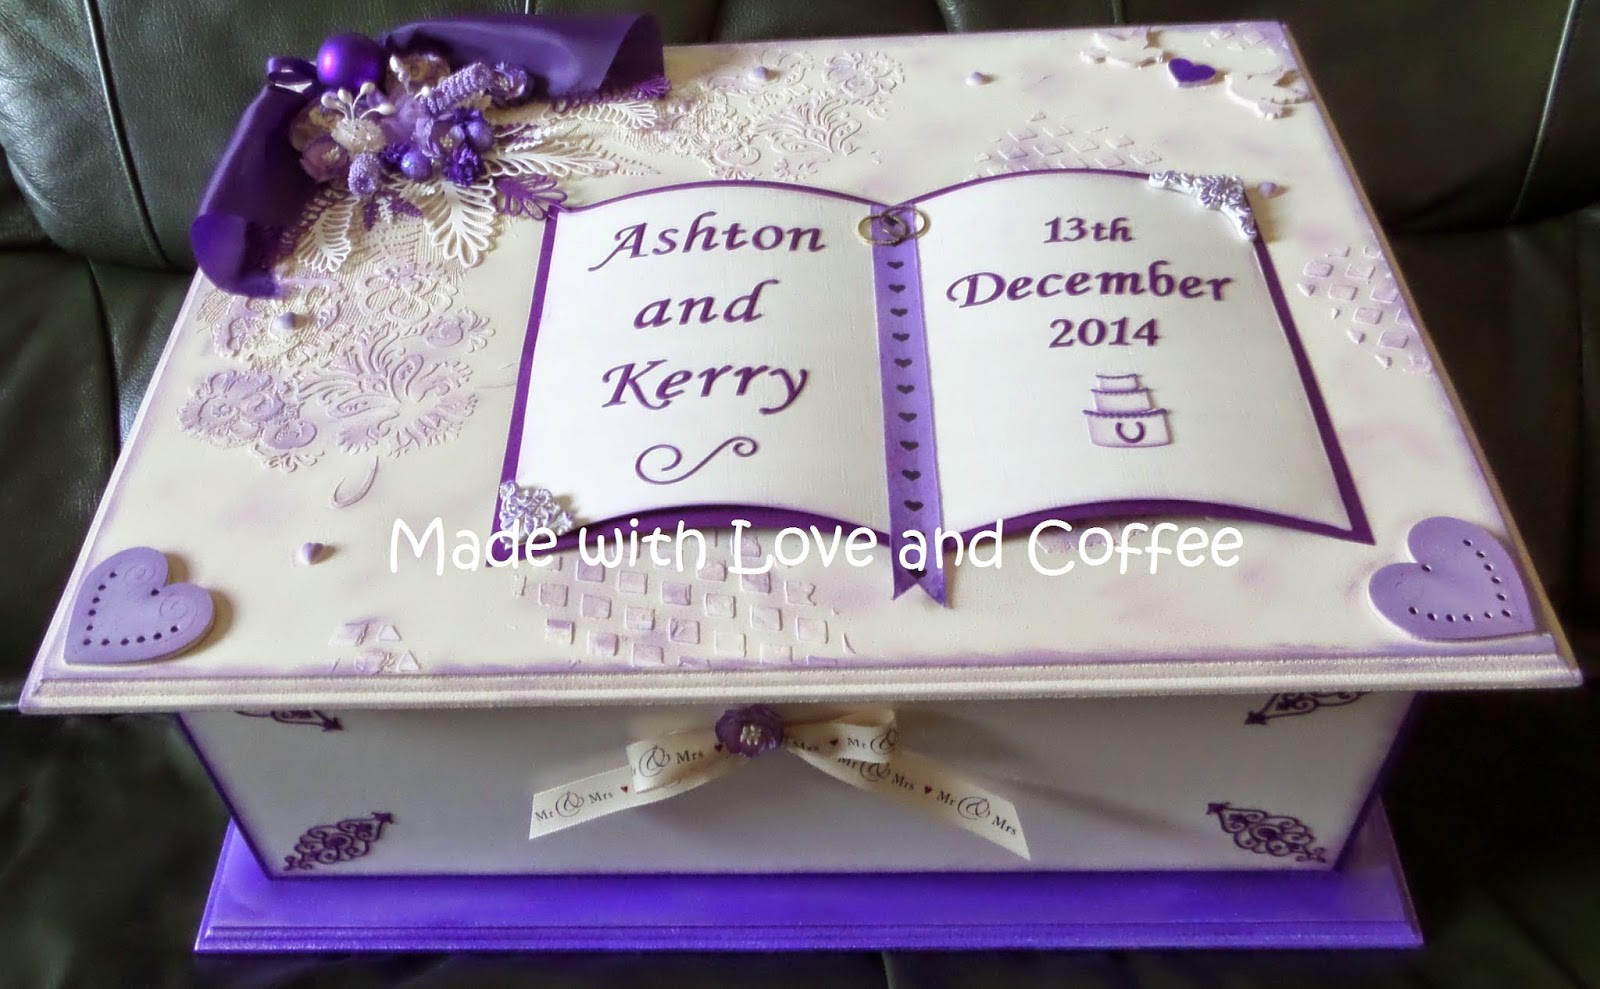
I thought I'd share a few wedding cards, a candle & a keepsake box with you...no reaching for the chocolate though...I know you're tempted with all that gorgeous purple!!  :D


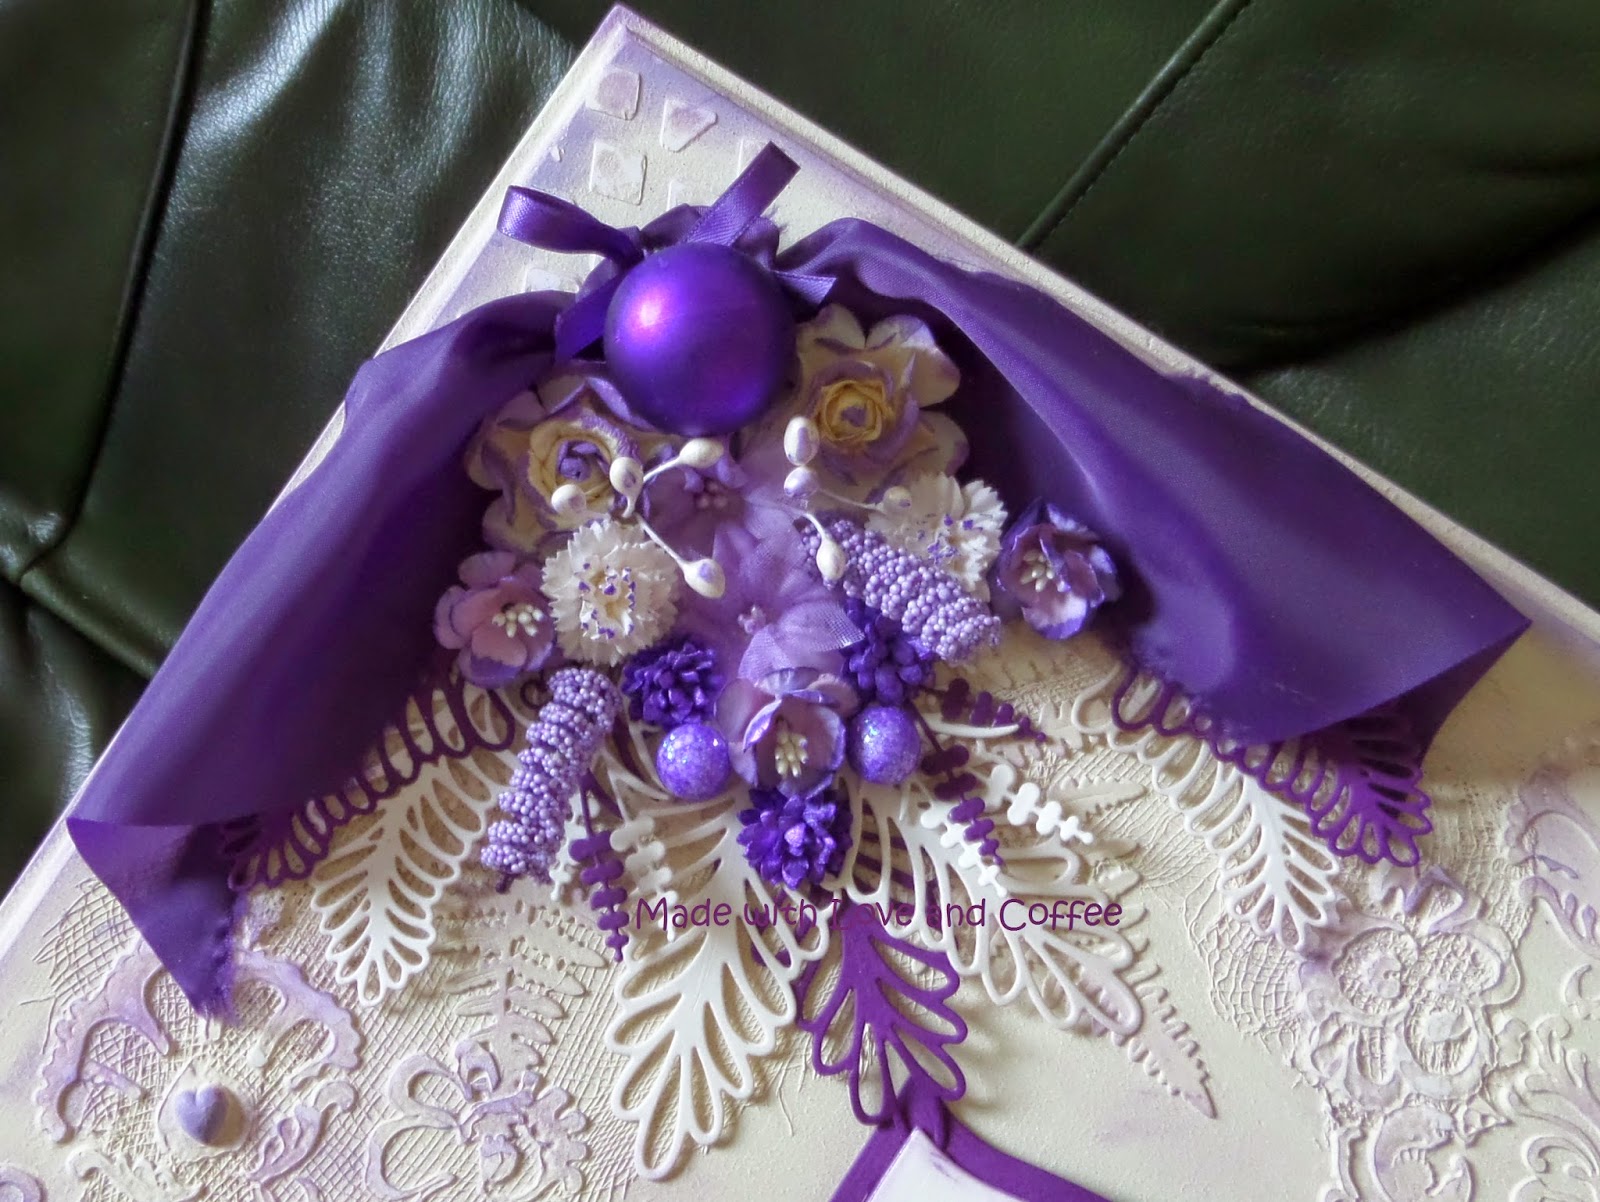
A keepsake box (the mdf box was made by my wonderful other half)... to keep all those special Wedding Day treasures in....


A candle to use or keep ...


and cards...


...and this one was for a different wedding....


I really am going to try and visit my own blog more often in 2015....so hopefully I'll see you soon!!! ;) xx
I'm going to enter these into the
Fussy & Fancy challenge - Pearls & Swirls
Happy Crafting

Lydia xx

Tuesday, 9 September 2014

IndigoBlu - Gothic Mannequin & Demo Day


Morning one and all!!
I have a new project to share today...and a shout out! :)
If you are around the Fareham area on Saturday the 27th of September...or fancy a fab day out.., I will be at Jendenink Craftworks from 10am - 4pm demoing fabulous IndigoBlu products!!
I will be demonstrating the Flitterglu Starter Kit...Mega Flake...English Cottage Garden Paint ~ Including the 6 ever-so gorgeous, brand new metallic colours ... Slap It On Starter Kit with Mannequin ...AND the scrummy NEW Christmas stamps!!!

The mannequins are an awesome project to lose yourself in!! Hundreds of different ways to decorate them and no two will ever be the same! From Girly to Goth...the choice is yours!! :)


I have used the fabulous Hocus Pocus stamp set on this one...and hand sewn the ribbon and organza layers. To finish it off I've used both the Crackleglaze Background stamp...and spider & web from Hocus Pocus with Mega Flake on the stand.


If you want to know how to make your own...come and join me...it'll be a great day! :)

Jendenink Craftworks  - 167 West Street - Fareham - Hants - PO16 0EF  ~  10am - 4pm


Happy crafting

Lydia xx

Monday, 1 September 2014

Summer Holiday/Vacation - Tattered Lace September Challenge


Wow!!! Here we are in September already!!! Two more days until the girls go back to school, then it'll be Christmas all the way in Craftland!!! :O
Before that though, the new Challenge from Tattered Lace is Summer Holidays/Vacation! A great excuse to have one more sunshiny blast before we switch the sun off and the lights on!!

I have made up a beach scene from all sorts of different Tattered Lace dies...none of them really made for the purpose I've used them for.
Ok...so with my background cardstock inked with Tim Holtz Distress Inks, I have used;
Sun - Lacy Daisy 
Seagulls - Waste from the Curved Parasol
Boat - Planter from His DIY and Gardening set
Mast - Baby's Breath
Flag - Carriage window from Lace Carriage
Waves - Chantilly Rose
Beach Umbrella - Curved Parasol and Baby's Breath
Sand Castles - Watering Can from His DIY and Gardening set
Bucket - Watering Can from His DIY and Gardening set
Bucket handle - Rim of a wheel from Lace Carriage
Spade - His DIY and Gardening set


So there we have it...a Tatty Beach!! :)
Your Tattered Lace dies are never ever just the image they are meant to be...they are that and sooooo much more!! x
The prize for our winner of this challenge will be a Tattered Lace Embossing Folder Surprise Bundle!!!

Happy Crafting! 

                                                                        Lydia xx
LinkWithin

Related Posts with Thumbnails